Wednesday, 30 April 2014

Moulding: Part one

When sculpting a prosthetic piece for the front of the face it is recommended to use the two part mould process. This method is used when making a facial appliance as one side of the mould will fit secularly to the models face and the opposite side is where the sculpt will be produced. When moulding most use a variety of flexible rubber products to mimic fine details and that are easy to remove from the original cast. These products include latex, silicone rubbers and gelatine and can be used more than once. Below is a moulding part one step by step with process images for the specific brief:
Image one
What you will need:
- Cast
- Clay
- Thin edge object (store card)
- Plastic bucket x3
- Tin silicone
- Burlap
- Catalyst
- Jesmonite powder
- Cold water
- Fibre glass matting
- Paint brush (which can be thrown away)
- Plaster
- Gloves (latex free)
- Overalls
- Paint scraper
Step 1: Set your equipment up on the table, put on your overalls and one pair of gloves.
Step 2: Place the cast in front of you. begin to shape an oval of clay using a thin edged object around the cast use water to soften the clay.The oval should be around 2cms high and should lie smoothly on the cast. This is made to avoid undercuts which means when silicone and jesmonite is added it will not get stuck on the cast when dried and removed. The oval is made round the edge of the cast so that it is smooth to the sculpt on. Using a small rounded object add keys in the oval clay. Keys are designed to make sure the two halves come together correctly and when the two half’s lock together they are therefore properly in line. (Image one). A wall of clay should then be added around the base. Diagram one implies where undercuts may exists 
Diagram one


Image two
 Step 3: Take your first plastic bucket and mix catalyst 
with tin silicone with a ratio of 1:10 A layer of silicone should be 300g and catalyst should be 30g. Mixing these two products is easy and is called the GI series and is used in mould making as the chemical made will cure at room temperature over virtually any surface. Use the paint brush to apply the product to the cast starting at the highest point of the cast and allowing it to drip down make sure not to trap any air bubbles. Cover the cast before the silicone sets.

Step 4: Wait for the silicone to set. This will take around 45 minutes. (Image two)

Step 5: Take your second plastic bucket and mix jesmonite powder with water of a ratio of 2:1, in this case one mug of water and two mugs of jesmonite powder. Use the paint brush to apply the jesmonite to the highest point of the cast avoiding air bubbles. Cover the area slowly adding pieces of fibre glass matting. This product is added to support the silicone when de-moulded. (Image three)
Image three


Step 6: Wait for the jesmonite to set. This will take around 30 minutes. (image four)

Step 7: Use the paint scraper to de- mould the silicone from the plaster. You should then have the negative.

Step 8: Take your final plastic bucket and mix cold water to plaster using a cup ratio of 1:2.5. This should make a paste like texture.

Step 9: Fill the negative with the plaster slowly using your hands. Also add burlap during this process avoiding bits that may stick out. Continue adding the plaster and spread it around the silicone until it is extremely thick. Allow this to set. (Image five)

Step 10: Using your hands, pull apart the silicone from the plaster. This will give you the positive which is what will be used to sculpt upon. The silicone piece can be saved for another mould.
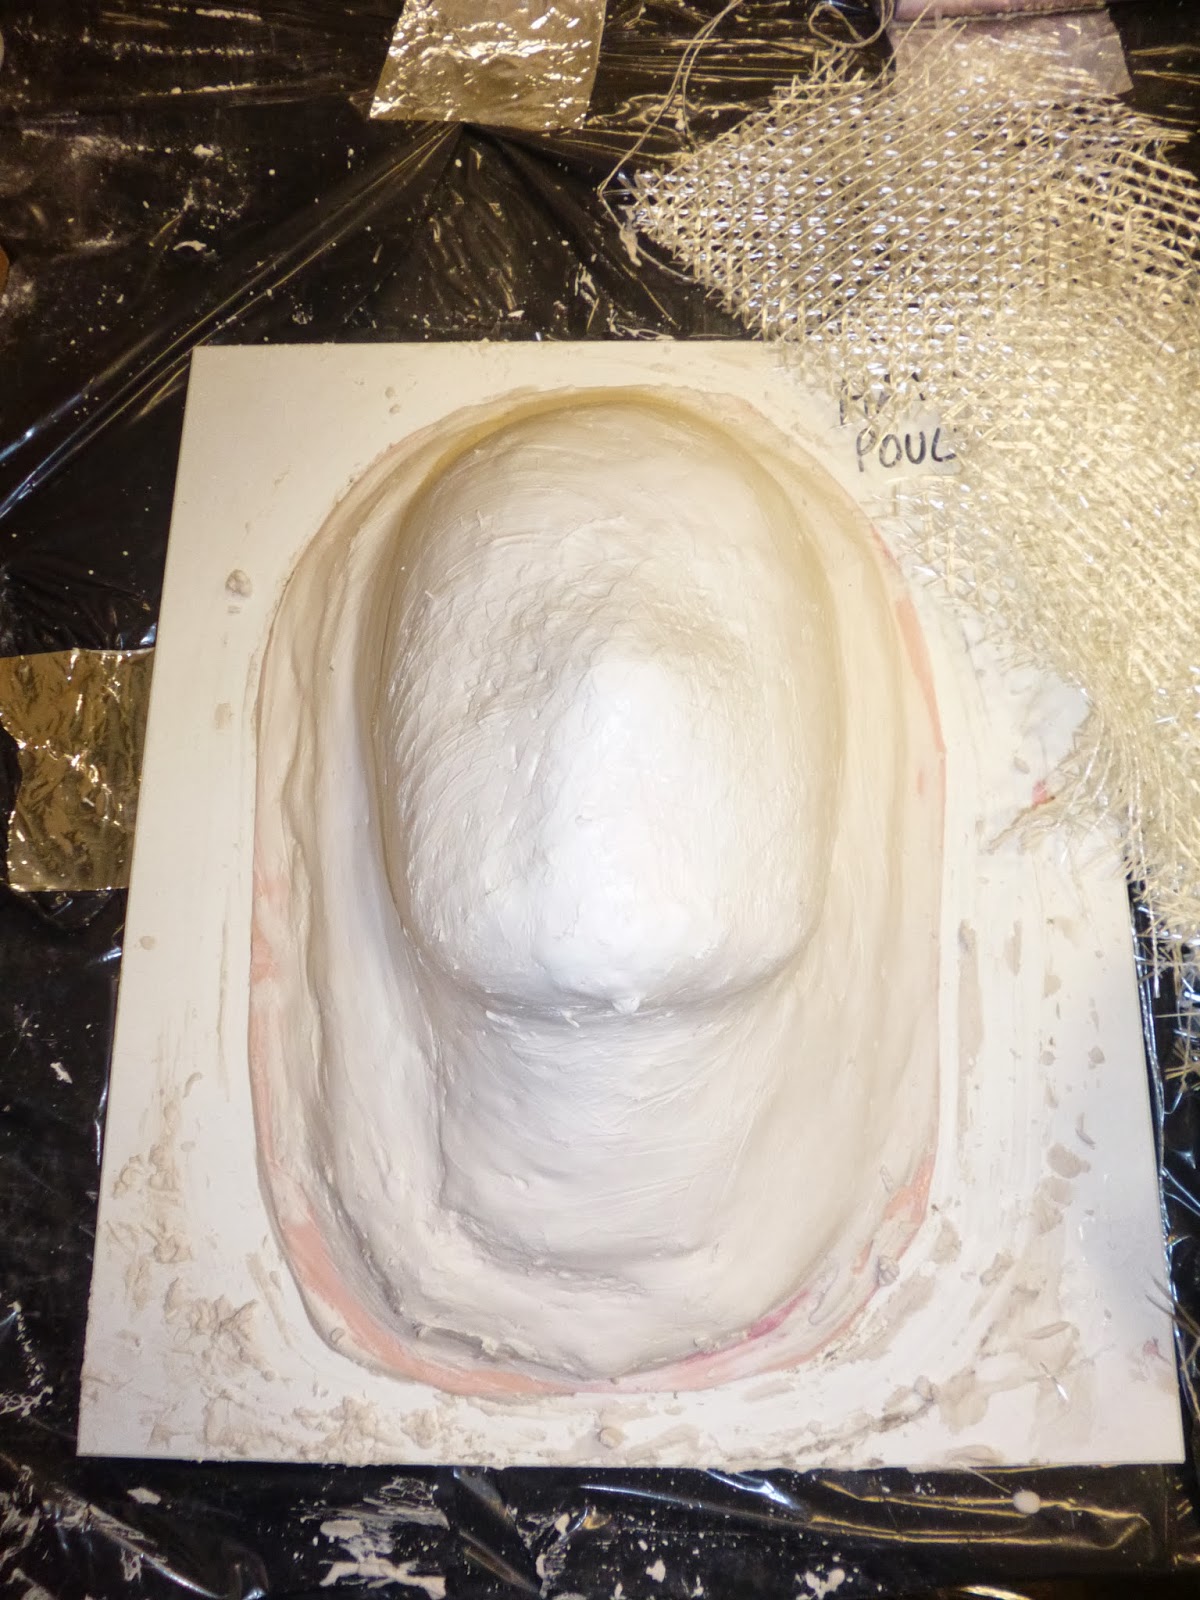
Image four


Image five


Sunday, 27 April 2014

Moulding Part One Evaluation

The next step in making a prosthetic facial appliance after casting the face, is the moulding part one process. This stage is done to add a wall round the edge of the positive so that the edge of the plaster is no longer jagged and sharp. By doing this step, clay when being sculpted can be blended smoothly on the outer part of the sculpt. This part of the process includes building a clay base around the cast, adding catalyst and tin silicone once mixed together, adding jesmonite, water and fibre glass matting, separating the positive from the negative, and finally pouring the plaster into the negative and separating it when dried.

During the demonstration of the moulding part one I took notes to ensure that when executed by myself it was done correctly as it can easily go wrong when each step is so specific. This showed organisation, listening and planning skills. Cutting up the fibre glass and having the correct amount of catalyst, tin silicone, jesmonite and water ready demonstrated preparation skills. As there was others in the class also carrying out this process, it was a chance to display our team work skills as we could point out to others if they had missed covering parts of their mould. By following each step correctly, the task was successful.

Once the jesmonite was dry, the positive was to be separated from the negative. This was done using a paint scrapper. The original face was then disposed of. The plaster was mixed with water and then poured into the silicone and burlap was added which was secured by the fibreglass matting and jesmonite. Once this hardened, I separated it from the negative to produce another positive, however a small area of the wall broke off. This was due to the plaster still being slightly warm. To fix this, I used Poly Filler  which secured the broken wall. This showed problem solving skills. If I was to complete this task again I would try to be more patient when waiting for tools and products to set. 


Friday, 18 April 2014

Sculpting

Sculpting is the next process after completing a cast and moulding part one. Oil based clay and water based clay are the two types which would be used when sculpting a piece for prosthetic makeup. Water based clay would be used when sculpting something small which would not take long to complete. This is because water must constantly be added to stop the clay from drying out. Oil based clay would be used for a task which will take longer and requires more detail. To create a fantastic, precise sculpture it is important to use reference images which give you a general idea of the design. By sketching an image, this may help the process as you can see on paper the idea of the final piece. Below is a step by step process of sculpting using oil based clay. This step by step fits my project brief.
Image one
What you will need:
- Mould
- Oil base clay
- A variety or sculpting tools
- Hard wire brush
- Talcum powder
- Reference images
- Wax applicator stick
- Oven
- Powder brush


Image two
Step 1: Set up your equipment. Turn the oven on to 50 degrees. Make sure the clothes you are wearing are suitable for getting dirty and possibly ruined. 

Step 2: Place the clay in the oven. Check the clay every couple of minutes. When it is ready it should be warm and soft. This will make the clay easier to shape. 

Step 3: Put some of the clay on the nose of the mould and begin to shape the nose of the fox using your hands. (Image two)

Step 4: Begin to shape the rest of the facial appliance by adding more clay, it should stop above the top lip. The edge of the clay should follow the centre of the cheeks just below the cheek bone up to the temples of the head. It should then follow the hair line stopping about 1.5 cms from the top circling round meeting at in the middle of the forehead. There should be circles around the eyes where the clay has not been added.  

Step 5: Use your sculpting tools to constructs the nose and cheek bones.

Step 6: Take a sculpting tool with a rounded edge to scoop to nostrils in the bottom of the nose. Use your fingers to smooth them out.

Step 7: Using the hard wire brush, create strokes that resemble wolf fur. Use the reference images to see what directions the hair lies.

Step 8: Take a sculpting tool with a sharp edge to create the pores in the end of the nose.

Step 9: Using the same tool, straighten the edge of the clay including the edges around the eyes. Then take the wax applicator stick to smooth the clay down. This is so that when the prosthetic is on the face it will blend well with the skin. (Image three)

Image three
Step 10: When you feel the sculpt has the correct shape and features, cover it in talcum powder with a powder brush (Image one)

Saturday, 12 April 2014

Sculpting Evaluation

Sculpting a facial prosthetic piece is the next step after face casting and moulding part one. For this occasion, oil base clay was used as it is the preferred clay when sculpting for a large area with a lot of detail. Strange beauty being the topic for my sculpt I decided to keep it fashion based and relate it to Jean Paul Gaultier 2008 Winter collection where the models wear animal heads as hats. My sculpt is the shape of a foxes nose and cheeks and blends out on the forehead.

For this section of the module I provided reference images to assisted me when building the correct shape I was hoping to achieve. A friend drew up the design which was described to him which helped me stick to the structure of the animal feature. Sculpting tools were bought prior to the task. This showed  good preparation skills. Research was completed before the task so there was a clear understanding of what the final product would look like. This demonstrated research skills. I set myself a target to have the sculpt complete by a certain date to improve time management skills. When the product was finished, it look precise and similar to a fox which showed creative skills.

At first it was difficult to construct the correct shape of the nose with out it looking like the nose of a mouse of chipmunk. A humans face compared to a foxes face is flat which means that the exact same shape of a foxes nose on a human face would look odd and not correct. I had to work around this problem and keep moulding the nose until I had produced a satisfying shape. This demonstrated problem solving skills and although at some point I got impatient it showed I have the ability to persist. If I was to complete the task again I would try to have more patience and spend more time on the sculpt as although the final result is satisfying, I feel it could look better.   


Thursday, 10 April 2014

Moulding Part Two

After sculpting an oil based clay design, the product then needs to be moulded so that casting the appliance can be done a number of times to maintain more than one prosthetic piece. This is done using a two part moulding process to create the positive mould, which in this case will be the shape of the models face, and the negative which will be what has been sculpted. Below is a step by step for moulding part two with process images for the specified brief:
Image one

 What you will need: 
- Cloak
- Clay
- Oven
- Mod rock
- Cold water
- Plaster
- Gloves (latex free)
- Burlap
- IPA
- Scissors  
- Screw driver
- Sculpting tools
- Large paint brush
- Mould release spray

Step 1: Set up equipment and put on cloak. Turn the oven on to 50 degrees. 

Step 2: Heat the clay in the oven until it is soft then add a thin layer to the cast which has not been sculpted on. Smooth the clay down. This is called an overflow and is made to catch excess latex when squeezing the positive and negative mould together.

Step 3: Use a sculpting tool to create a thin line between the sculpt and the rest of the clay. This line should allow you to see the cast and is called a cutting edge. The clay around the cutting edge should be extremely thin as this will be the edge of the prosthetic piece and will need to blend well onto the skin. Then build a clay wall an inch high around the mould using water based clay. (Image two). Spray the mould with mould release spray which will help the two moulds release when pulled apart.  
Image two

Step 4: Using cold water, soak and drain pieces of mod rock and add this around the outside of the clay wall. This is to secure the wall.

Step 5: Using scissors, cut squares of burlap to fit over and around the sculpt in preparation of using it. 

Step 6: Mix plaster to cold water at a ration of  2.5:1 creating a paste like substance. Use a large paint brush to add the plaster to the sculpt slowly building it up. Also add the burlap during this process (Image three). This is done so that when the plaster is dry and the negative is pulled from the positive, the negative stays firm and does not crack. 


Step 7: Once all the plaster has been added and begins to thicken, leave the product around 20 minutes to cool down before separating the negative and the positive. 

Step 8: When the plaster has cooled, use a screw driver to release the negative away from the positive. This must not be rushed and must be done with care other wise there may be a chance of the plaster cracking. (Image four).


Image three
Step 9: Once the two parts have separated, the negative mould should resemble the sculpture. (Image one). Remove the clay from the negative mould to be left with a mould of the models face. 

Step 10: Clean the two moulds using cold water and IPA. This is done to remove all the clay. You should then be left with a two part mould ready to cast the appliance.   


Image four

Thursday, 3 April 2014

Moulding Part Two Evaluation

Moulding part two is done to achieve a negative mould of the product which has been sculpted. Once this is complete, one is left with a two part mould, a positive mould of the models head and a negative mould of the sculpt. This process included the use of clay and plaster and was a rather fast exercise. It is important to complete this step as once this has been accomplished, casting the appliance can be conducted which is done by pressing the two moulds together.

An overflow was made with clay which then created a cutting edge. This was constructed well around the edges of the sculpt which was later found extremely helpful once the appliance was cast. Before the moulding began, a work station was set up neatly to allow me to access products quickly when neededThis showed good organisation and preparation skills. The demonstration was followed correctly which demonstrated good listening skills and the ability to follow instructions. The exercise went well. 

Although all the instructions were followed as described, once the first appliance was cast, both moulds began to crack which meant that this would be shown in the detail of any further appliances. This also meant that the moulds may not stay solid when casting the appliance again. It was understood that the cause of this was due to the plaster not being thick enough which meant a ratio of water to plaster should not be 1:2.5 but perhaps 1:3.5. A new batch of plaster with the new ratio was made up and added around the outside of the negative mould and to the edges of the positive mould. Burlap was also encountered to assure the moulds would stay stable. This demonstrated problem solving skills. If I was to complete the task again, I would make sure the plaster was thick enough by adding more plaster to water and would add more to the moulds.   

Tuesday, 1 April 2014

Casting the Appliance

For this assessment, the final piece will be made with foam latex. This is because the prosthetic is to be flexible and move when the face moves. All foam latex systems are a combination of natural latex (concentrated sap of rubber trees), a soap to make the foam whip up to desired volume (foaming agent), a vulcanizer (curing agent), and a coagulant (gelling agent). Foaming agent is a substance which is safe to use however curing agent and gelling agent are both toxic ingredients. Below is a step by step which demonstrates detailed instructions of this process with images. 

Image one

What you will need:
- Gloves (latex free)
- Cloak
- Scales
- Mixer
- Spatula
- Latex foam base
- Foaming agent
- Curing agent
- Gelling agent
- Syringe
- Small plastic pot
- Timer
- Oven
- Large paint brush
- Two part mould
- Mould release agent
- Screw driver

Step 1: Set up equipment on the table. Put on the gloves and cloak.

Image two
Step 2: Place the bowl from the mixer onto the scales and reset the scales to 0.000. Pour 300g of latex foam base into the bowl. (Image one).

Step 3: Reset the scales to 0.000 then pour in the foaming agent which should be 20 per cent of the foam base, which in this case is 60g.

Step 4: Again, reset the scales to 0.000 then add curing agent which should be 10 per cent of the foam base which should be 30g.

Step 5: Place the bowl back onto the mixer and turn the mixer on at a maximum speed. This is done to make the latex rise and give it volume. Set four minutes on the timer.

Step 6: Once the four minutes is up, turn the mixer onto the lowest setting. and set the timer for six minutes. This is done to cut down the number of air bubbles and make the product smooth.

Step 7: Place the small plastic pot onto the scales and set them to 0.000. Add gelling agent. This should be 10- 15 percent of the foam base depending on the temperature of the gel. If the gel is warmer use less and if it is cooler use more.
Image three

Step 8: Use the syringe to slowly add to the mix for another two minutes. This is to allow the foam to become a solid. (Image two). Use the spatula to scrape off any latex that may have risen in the bowl and mix it in.

Step 9: Once the mixing time is up, use the large paint brush to apply it to the negative mould making sure it is applied thoroughly to avoid air bubbles and so that the detail will show up well when finished. This should be done quickly while the latex is still a paste like texture. (Image three).

Step 10: Fill the rest of the mould with the substance up to the edges of the mask which has been sculpted. 

Step 11: Place the positive mould inside the negative mould then squeeze the two moulds together. The latex should then squirt out of the sides. (Image four).

Step 12: Leave the latex to set. This should take 10-15 minutes.

Step 13: The product should then be placed in the oven for three hours. This is so that the product has fully set and has become a solid.
Image four

Step 14: Once the product has set, use a screw driver to spate the positive and negative mould. This should be done with care to prevent the moulds from cracking. The appliance is then ready for application. For long term storage, the foam piece should be powdered and placed into a plastic bag then sealed.